Zapier
Zapier lets you connect Digits to thousands of other apps without writing code. This guide walks you through setting up a developer app in Digits, authenticating it in Zapier, and running a basic automation that reads a statement from Digits.
Digits is ready to connect with Zapier today through the Zapier Developer Platform. This guide walks through a private integration setup that gives you a working end-to-end connection, with a bit more flexibility and control than a standard directory-based setup.
Part 1: Set up a Developer Account in Digits
- If you already have a Digits account: Open your account and look for the Developer tab in the left sidebar.
- If you're new to Digits: Sign up at my.digits.com/join/developer. You can also reach out to [email protected] to share what you're building.
Once you're in, you'll land on the Developer Dashboard, which gives you access to:
- Developer Sandbox — a demo company pre-loaded with sample data
- API Docs — Quickstart guide and full API Reference
- Create App — register a new app and get your credentials
Click Create App to get started.
Part 2: Create your App in Digits
This step registers an OAuth client — it's how Digits knows who's connecting and what they're allowed to access.
Fill in the following fields:
Identity
| Field | What to Enter |
|---|---|
| App Name | e.g. "Zapier Integration" |
| Tagline | e.g. "Connects Digits to Zapier Workflows" |
| App Icon | Upload a logo or leave blank for now |
Summary
| Field | What to Enter |
|---|---|
| Description | Brief overview of what the integration does |
| Homepage | Any valid https:// URL |
| Support Email | Your support email |
| Developer Email | Your email |
Scopes
Select the scopes your app needs. You can always adjust later, though changes may require users to re-authorize.
| Scope | Select if... |
|---|---|
ledger:read | Your app reads financial data from Digits (P&L, balance sheet, transactions, etc.) |
source:sync | Your app writes or syncs transaction data into Digits |
documents:write | Your app uploads files or documents to Digits |
Click Save, then accept the Developer Terms of Service.
Part 3: Set up your Integration in Zapier
First time: Go to developer.zapier.com and click Start a Zapier Integration.
If you've built one before: Go to developer.zapier.com and click Platform UI under "Need to build an entirely new integration?"
Fill in:
- Name
- Description
- Intended Audience
- Role
- Category
Click Create.
Part 4: Configure Authentication in Zapier
After you click create, you’ll land in Version Overview. Click Authentication in the left menu or Set Up Authentication.
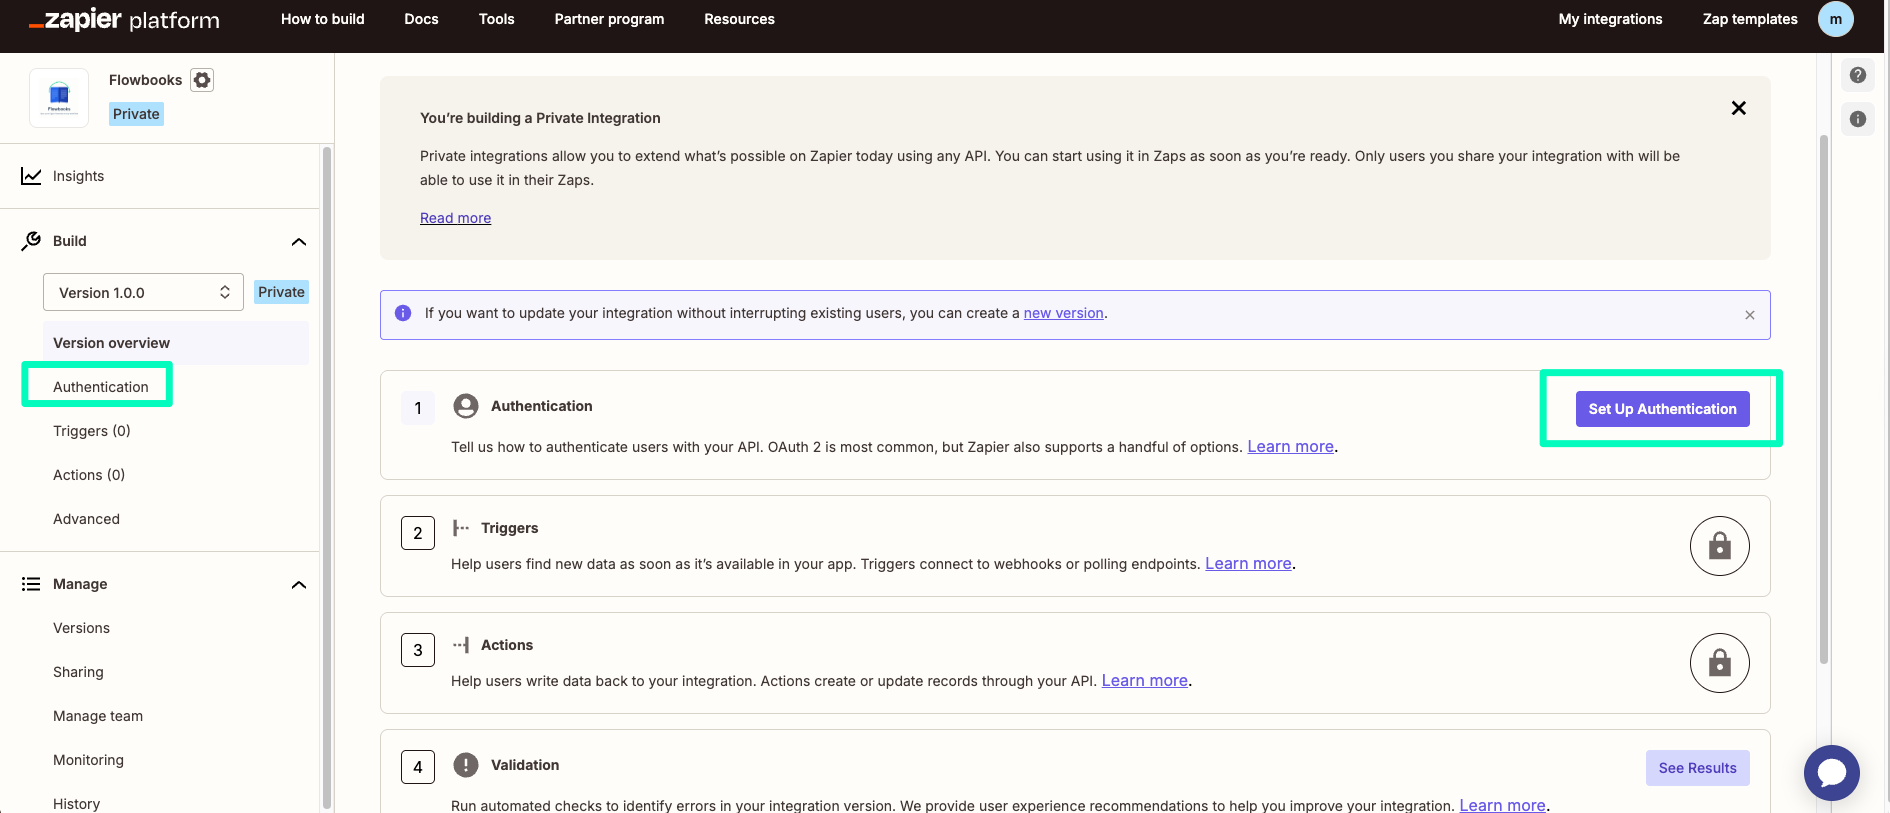
Select OAuth v2 and click Save.
Next, work through each step:
Step 1 — Configure your Fields
Digits OAuth is standard. Don't add any fields — just click Continue.
Step 2 — Copy your OAuth Redirect URL
Copy the redirect URL shown in Zapier. Go back to your Digits app → Configuration tab → paste it in → click Update. Then return to Zapier.
Make sure you click Update in Digits before continuing. If this URL isn't saved exactly, you'll get an invalid client_id or redirect_uri error later.
Step 3 — Enter your Application Credentials
- Enable PKCE: check this box
- Paste in your Client ID and Client Secret from the Digits Keys tab.
- Click Save & Continue.
Step 4 — Add OAuth v2 Endpoint Configuration
Enter the following:
- Authorization URL:
https://connect.digits.com/v1/oauth/authorize - Scope: Enter the scope(s) your app needs, separated by spaces:
ledger:read— read financial data from Digitssource:sync— write transaction data into Digitsdocuments:write— upload files to Digits
- Access Token URL:
https://connect.digits.com/v1/oauth/token - Refresh Token URL:
https://connect.digits.com/v1/oauth/token - Test URL:
https://connect.digits.com/v1/company
Click Save and Continue.
Step 5 — Test your Authentication
Click Connect to [App Name]. A Digits authorization pop-up will open in a new browser window.
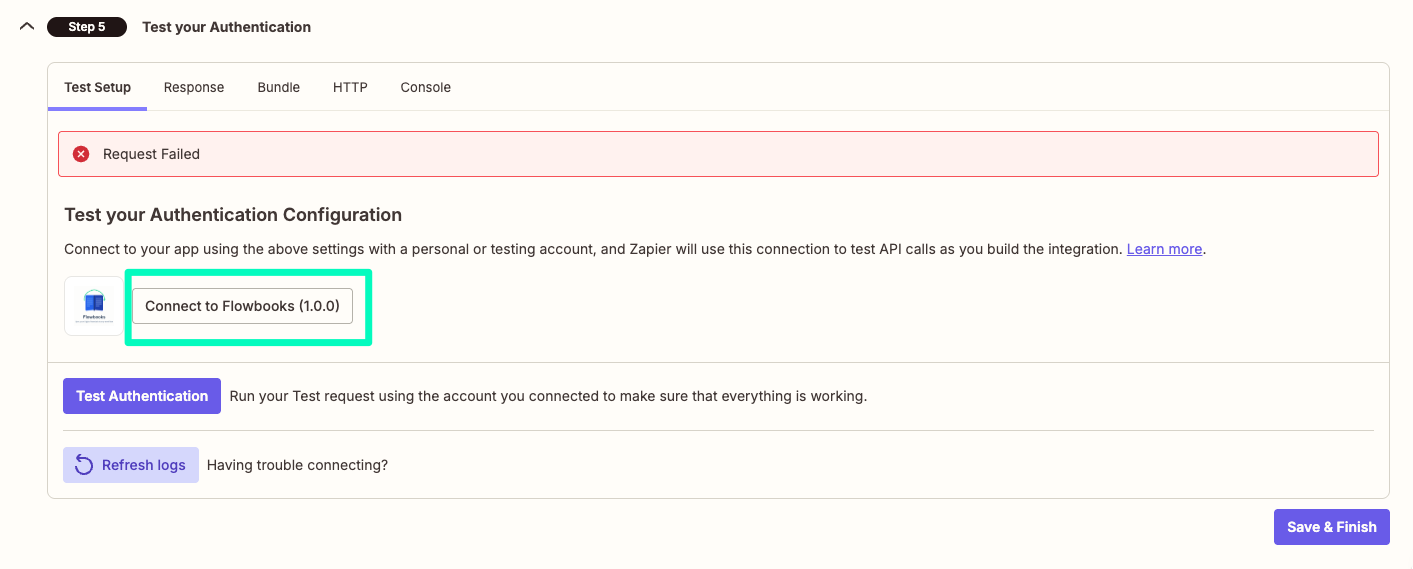
If nothing opens, check for a blocked popup notification in your browser's address bar and allow popups from zapier.com.
Log in to Digits and click Allow. The window will close, and you'll be returned to Zapier.
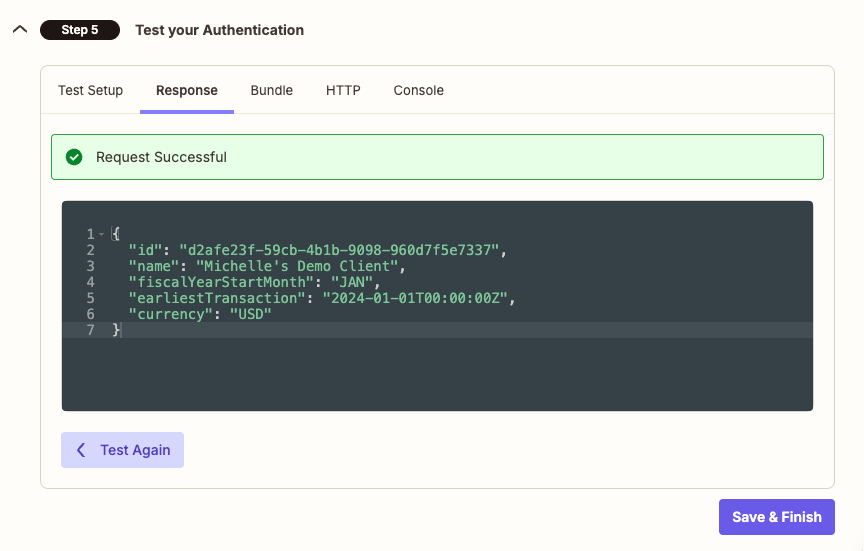
If your test is successful, click Save and Finish.
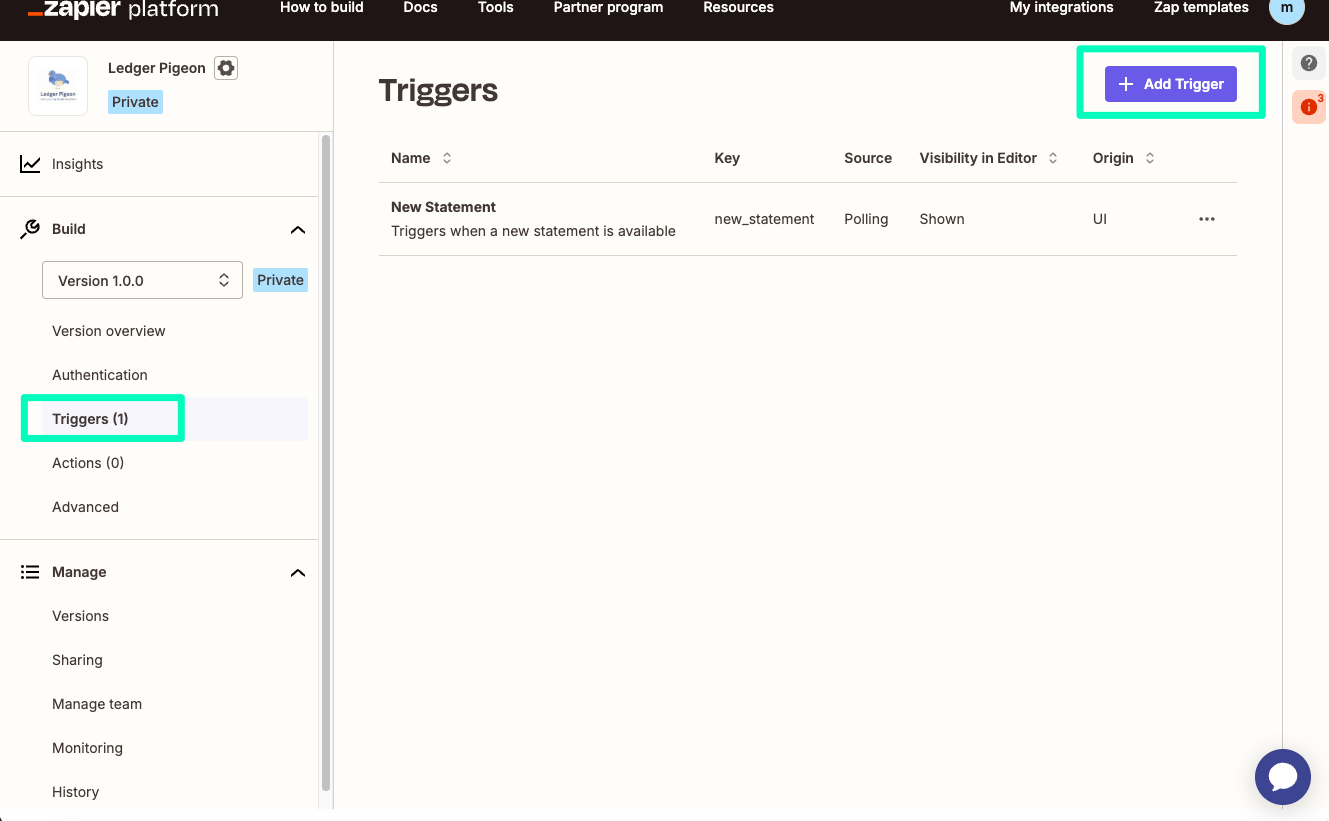
Part 5: Set up your Trigger
A trigger tells Zapier what event to listen for in Digits. You can create triggers for different data types. For example, to fetch a Balance Sheet, Cash Flow statement, or transaction list. This example uses Profit & Loss, but the same steps apply to any Digits endpoint.
In the left sidebar, click Triggers → Add Trigger.
Settings tab, fill in:
- Key: a unique identifier in snake_case, e.g. get_profit_loss
- Label: a user-friendly name, e.g., Get Profit & Loss Statement
- Noun: the main resource, e.g., Statement
- Description: a clear description, e.g., Retrieves a Profit and Loss statement from Digits
Click Save & Continue.
Step 1: Configure your API request
Go to the API Configuration tab, click Switch to Code Mode, and confirm the prompt.
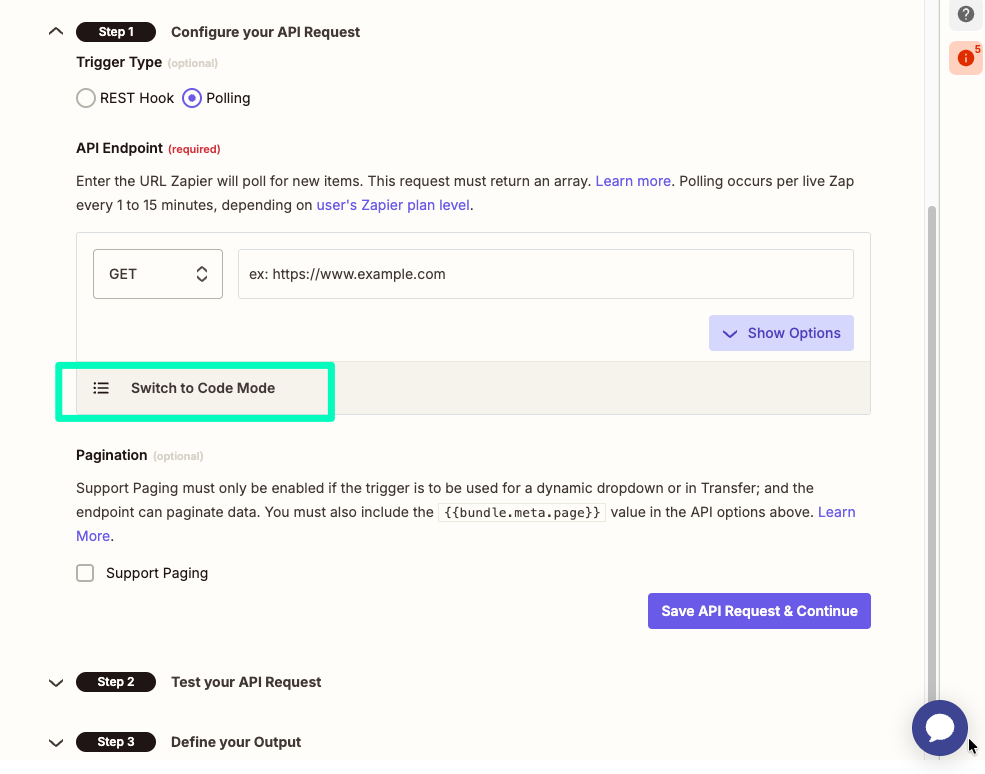
The code below is set up for the P&L endpoint. To use a different Digits endpoint, swap out the URL for the relevant one from the Digits API Reference. Replace the default code with:
const options = {
  url: 'https://connect.digits.com/v1/ledger/statement/profit-and-loss',
  method: 'GET',
  headers: {
    'Accept': 'application/json'
  },
  params: {},
};

return z.request(options)
  .then((response) => {
    const data = response.json;
    const rows = data.rows || [];
    return rows.map((row, index) => {
      return {
        id: row.id || index,
        ...row,
      };
    });
});The Digits P&L endpoint returns an object with a
rowsarray inside it. Zapier requires a plain array with anidfield on each item — the code above handles both of these requirements.
Click Save API Request & Continue.
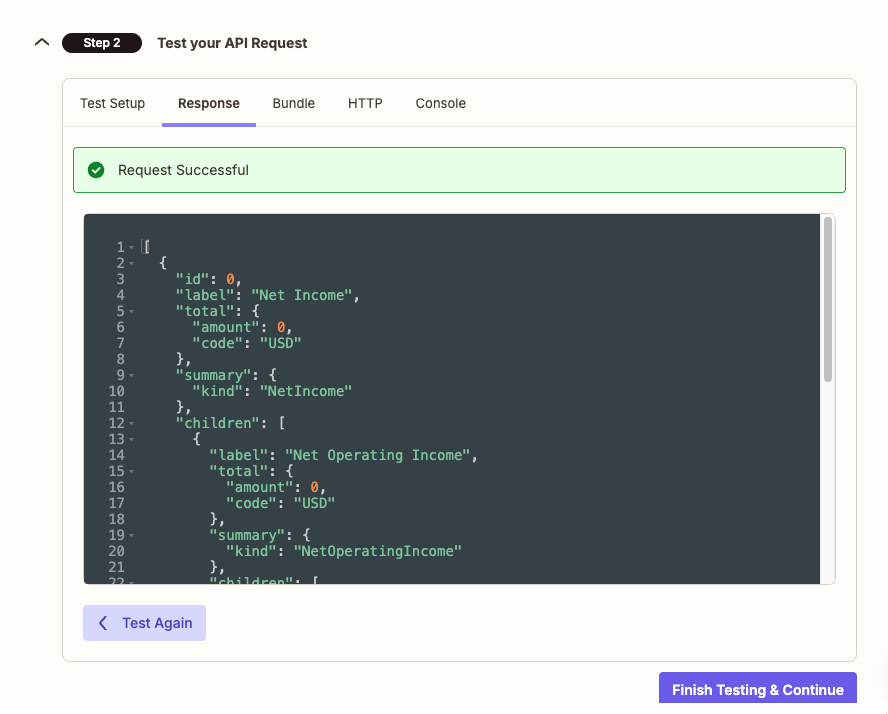
Step 2 — Test your API Request
Click Test Your Request. You should see Profit & Loss data returned from your Digits sandbox. If it succeeds, click Finish Testing & Continue.
Part 6: Add your App to your Zapier Account
If your integration is set to Invite Only, you need to add it to your account before you can use it in the Zap builder.
- Go to developer.zapier.com and open your integration
- Click Sharing in the left sidebar
- Copy your invite link
- Open the invite link in your browser and click Accept Invite
Your app will now appear in the Zap builder when you search for it.
Part 7: Build a Zap
Now that the integration is set up, you can build a Zap using it:
- Go to zapier.com and click Create
- Select Zap from the dropdown list
- Search for your app name and select it as the trigger
- Choose Get Profit & Loss Statement as the trigger event
- Connect your Digits account
- Add an action — e.g. send the data to a Google Sheet, Slack message, or email
- Test and publish
Updated 6 days ago